In our 3rd studio lesson we were taught the
basics of editing our previous sequence. We were introduced to a new programme
called ‘Adobe Premiere.’ This is a very important video editing software application
allowing us to seek many new techniques and ideas.
We were firstly shown how to find our specific work and then
how to deal with it. Primarily you launch the programme ‘Adobe Premiere’ and open
the window at the top left to add a folder files where fortunately this allows
us to collect all our relevant information in this project window.
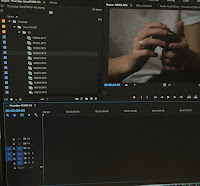
Key factors we then learnt are there are two video screens,
a timeline at the bottom of the screen going from left to right. The two
channels are highlighted with ‘V1, V2 and V3’ meaning video channels and
similarly ‘A1, A2 and A3’ for audio channels. We also got taught about ‘bins’
this name is associated with the word folders. ‘Bins’ appeared in old film
terms to highlight waste labels. To launch a new bin you press ‘folder’ and
then ‘new’, and lastly ‘bin.’ This is a prime important section from the
premiere.
 Secondly we learnt about a new term called ‘rushes’ meaning
footage. The word rushes originates from another film making term which simply
means at the end of a shoot the footage would be rushed off and be developed
over night for the producer and director to figure out what’s going on the next
day’; in America it is known as ‘daily’s’ as the footage or rushes are developed
in one day. Continuing we look at rushes shoots and then clicked on an
icon-populating window, this allows us to fully watch our footage. I learnt if
you click on words you can rename things and press play to start the footage or
press the space bar. The blue bar allows you to play back footage or scrub
forwards and backwards through these rushes.
I remembered Matt saying for a head start towards our
thrillers or bigger projects as film working is very much a team game, so therefore
we were hinted about ‘log shots’ which allows one to save items as this will
always take you back to the main source in case the editing fails. I learnt
about two principles of cutting, for example, ‘last moment in’ and ‘first
moment out’, this helps us when we find a moment of action happening. For
instance, (I) highlights a blue marker to select your chosen part and (O) for
ending it. Progressing on, you drag the picture down onto my timeline and you
can zoom in and out for closer detail using the ‘+’ and ‘-‘ on our keyboards.
Finally, we were asked to find moments when there was some big motion happening
and cut a movement in to allow smooth transitions and continuity slipping
(matching up two shots.)
Personally I found the lesson very effective and it helped
me to gain an understanding of the concept of editing and heightened the
enjoyment of learning new things and working on our own sequence. From this
successful studio lesson I gained a lot that I can effectively use in the future
for personal editing work, for example in the upcoming ‘Preliminary Task’ and
‘Thriller sequences.’ I am excited to
learn many more
tricks and aspects of ‘Adobe Premiere.’
Progressing on, I primarily thought of how to use my new
editing techniques in forthcoming work, for instance in the ‘Preliminary Task’
and ‘Thriller sequences.’ I will use the clever smooth transitions, cutting and
continue to develop my skills on ‘Adobe Premiere’ by practicing.


No comments:
Post a Comment